
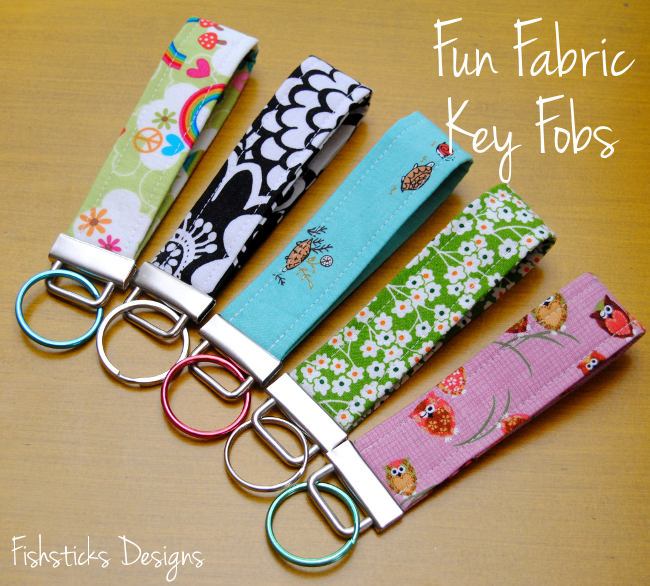
 Need a quick and simple last-minute handmade gift or a dozen gifts for a dozen friends that won’t take a dozen days to finish? With the right hardware on hand, you can turn out a pile of fabric key fobs in no time! I love how simple and practical these are, and how you can tailor them to the receiver just by choosing the right fabric. The rainbow of key fobs above are all going to be little handmade extras for the ladies on my list who are receiving store-bought gifts.
How about a quick tutorial so you can make your own? Before you start, you’ll need to purchase the metal hardware online. A quick search turned up quite a few Etsy sellers who carry the parts: Key Fob Hardware on Etsy. I used 1 1/4″ hardware. (Update: Check the purse hardware section at Joann Fabrics if you need a quick local source for the pieces.)
Cut a piece of fabric 10″ x 4 1/2″.
(If you want to be able to slide the key fob loop around your wrist, add a couple of inches in length. I prefer the slightly shorter length because I tend to toss my keys in my purse or tuck the fabric end into my jeans pocket.)  Iron a piece of very lightweight fusible interfacing to the back of your fabric.
  Fold your fabric in half with wrong sides together, matching up the long edges. Press.
  Unfold and press the long edges to the center.
 Fold the fabric strip on the original crease in the middle and press well.
 Topstitch along both long sides about 1/4″ from the edge.
 Grab a pair of pliers from your toolbox. (I like to use my needle-nose pliers.)
 To prevent scratches or dents in your metal hardware, wrap a piece of fabric around each set of teeth on your pliers. (I use strips of microfleece, but flannel would work well, too. You can tape these on if you have trouble with them sliding around too much.)
 Now you’re going to fold your fabric strip over so that the raw edges are together. (I like to pin the two sides together to keep the ends from sliding apart while I’m attaching the hardware.) Slide the raw edges inside the open end of the hardware.
 Press the hardware shut.
 And, you’re done! That was quick and easy, wasn’t it?


Great, thanks for the tutorial. I’ve been making these using webbing, but wanted to make some with just the fabric, and didn’t want to have to turn them. Thanks so much! Perfect!
Thanks for the easy-to-follow tutorial!
Where van I buy this hardware?
they have them at joann fabrics
Thanks for a great and easy tutorial. I am having trouble getting the clamps to prongs to grasp both sides of the key chain 🙁 Any tips? Should I straighten the prongs before closing?
I took a class where we made these in the hoop. The instructor said after we turned them and by the way this pattern is way much easier, but after we struggled and turned them we put some cold glue.. out of the glue gun inside the part that did not have the prong pressed down the fabric and put two drops on the fabric mashed the other side down then with the thing that we used to mash the clamp down. I am going to make these and sew the ends together with 1/8 inch and then drop a couple of drops of cold glue in the clamp and then both pieces will be perfectly lined up.. THANKS FOR THIS PATTERN.. It popped up on my Pinterest. I have been trying to make some of these for a show but dang making them In the hoop takes a long time. These will be a breeze!!!!!
I can be using my embroidery machine making something else while I am sewing these!
I wwas suggested this blog by way of my cousin. I’m no longer certain whether tis publish iis written via him as no
oone else recognize such specified about my trouble. You’re wonderful!
Thank you!
I am loving this tutorial! I would like to make some fobs to sell on my Etsy site. Do you sell a license to use this pattern?
I’d like to find out more? I’d love to find out more details.