
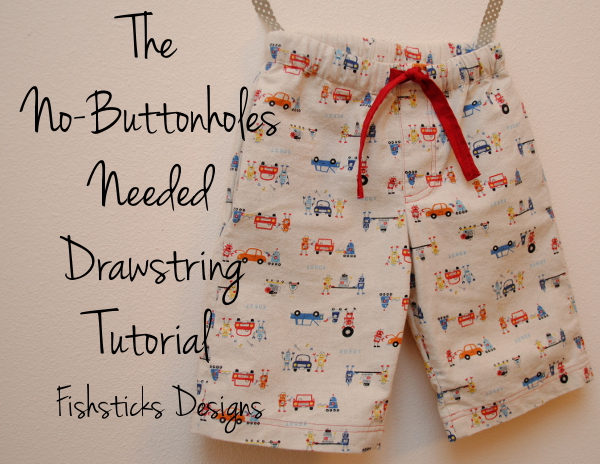
 Ready to sew up some cute shorts for your little guys this weekend? As promised, here’s my No-Buttonholes-Needed Drawstring Tutorial so you can give your Mud Puddle Splashers that great boardshort look! (You can really use this tutorial with any pants pattern that uses 1″ elastic pulled into a channel that is created by folding over the top of the waist.) If you missed yesterday’s post, just click here to go back and see my cuties modeling their new shorts.
An important note here before we move on: please be careful to keep your drawstrings safe! On items sold for children here in the US, the law allows for a waist drawstring to extend only 3″ past the opening when the garment is expanded to it’s maximum width: CPSC on Drawstrings in Children’s Clothing. Also, always be sure to secure the drawstring by stitching across it at the back or side seams so that it cannot be pulled out. Finally, don’t tie knots or add toggles to the ends of your drawstring.
In this tutorial, we’ll be creating two separate channels, one on the inside for the elastic and one for the outside for your drawstring. This method does take a bit more time than just putting in a few buttonholes and feeding the elastic and drawstring through the same channel. It’s probably not something that I’d want to do every time, but it’s not difficult at all, and it adds a fun new design element to your shorts. (And, it’s a great option if your machine doesn’t have an automatic buttonholer!)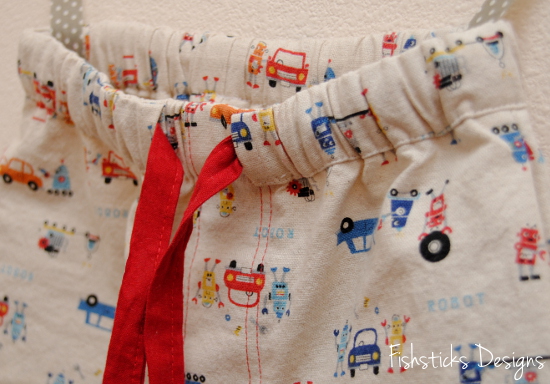 Let’s get started!
To begin, you’re just going to follow the pattern instructions to completely assemble your shorts or pants except for the waistband. If you’re using the Mud Puddle Splashers pattern like I am here, skip the memory creases on the waistline.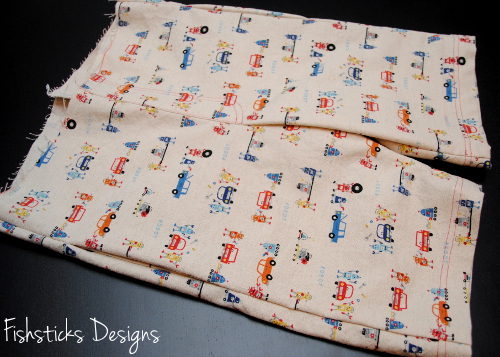 Measure the waist. (A flexible tape measure is probably a better choice for this, but mine has mysteriously disappeared.) The waistband on this pair of shorts measures about 26″ all the way around. Write this measurement down because you’ll use it again later to find the length of your drawstring.
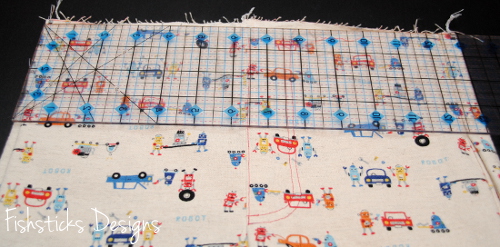 Cut a piece of fabric to make your waistband channel. This piece of fabric should measure 2″ x the measurement you just took of the waist of your pants.
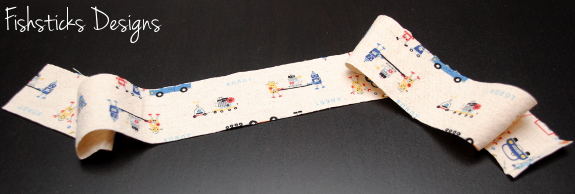 Fold in each short end 1/4″, then 1/4″ again. Press and stitch across to secure.
 Fold up the bottom edge of the drawstring channel piece 1/4″ to the wrong side and press well all the way across. (Do not sew this down yet.)
 Fold the waistband of the pants down 1/4″ to the wrong side and press well all the way around. (Do not stitch this either.)
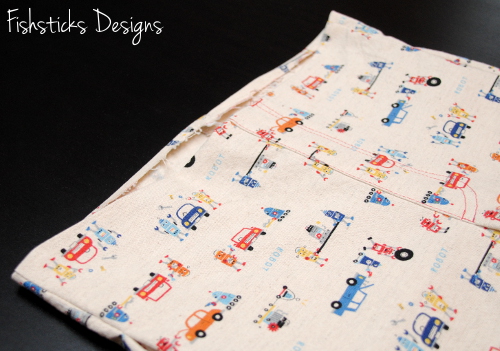 Fold your drawstring channel piece in half the long way and find the center. (I generally just press down at the center quickly with my iron, but you can also mark the center with washable or disappearing marker.) Match the center of the drawstring channel up with the back center seam of the pant. Pin in place here, right sides together, with the folded edges of the drawstring channel and the folded edge of the waistband aligned.
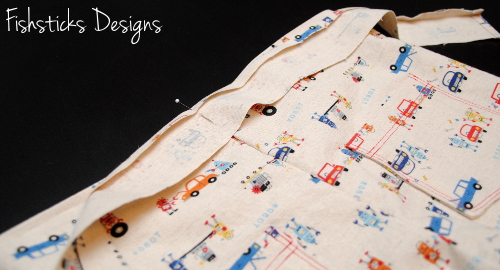 Wrap the drawstring channel around the front of the pants and pin it in place. (You only need a few pins for this step because you’re going to re-pin along the lower raw edge before sewing.) The front ends of the drawstring channel should fall about 1″ apart or 1/2″ from the center front seam of the pants. (Mine are a little further apart because my waistline measurement wasn’t as accurate as it would have been with a flexible tape measure.)
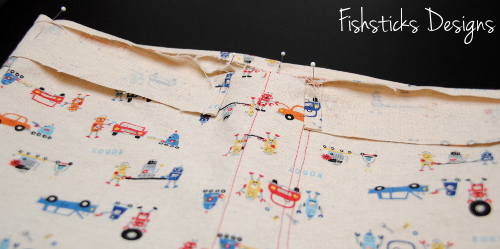 Pin the lower raw edge of the drawstring channel evenly all the way around the pants.
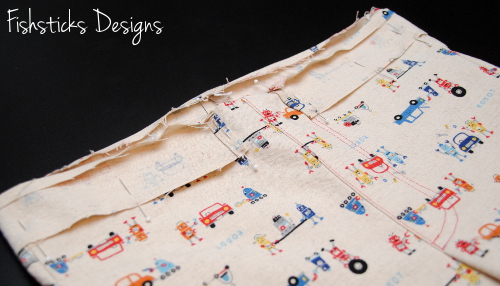 Stitch the lower edge of the drawstring channel in place 3/8″ from the raw edge as shown.
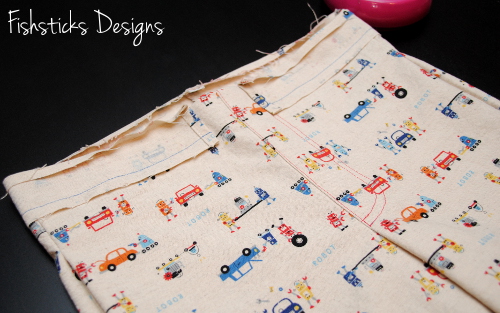 Fold the drawstring channel down away from the top of the waistband and press all the way around.
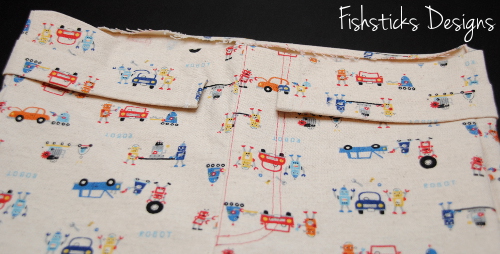 Fold the waistband down inside the pants. Fold the top 1/8″ of the drawstring channel to the inside, as well. This will make the bottom of the inside elastic channel fall slightly lower than the bottom edge of the drawstring channel, in turn making it much easier to catch both edges with one row of stitching. Press the waist really well before moving on.
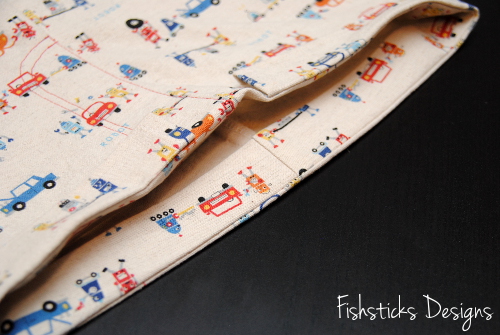 If you’re adding a size tag, now is the time to pin it in the back edge of the elastic channel. (I leave this pin in place and just sew over it.)
 On the outside of the pants, pin the bottom edge of the drawstring channel and the bottom edge of the inside elastic channel in place all the way around. Feel through and make sure the the bottom edge of the elastic channel is falling slightly lower than the bottom edge of the drawstring channel.
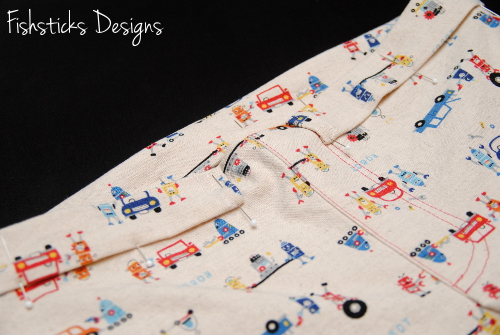 Stitch along the edge of the bottom of the drawstring channel catching the bottom edge of the elastic channel inside. You’ll be leaving the space between the ends of the drawstring channel open for now to insert the elastic. (If you plan to use a drawstring without elastic, you can go ahead and sew all the way across the front of the pants, closing up the elastic channel inside.)
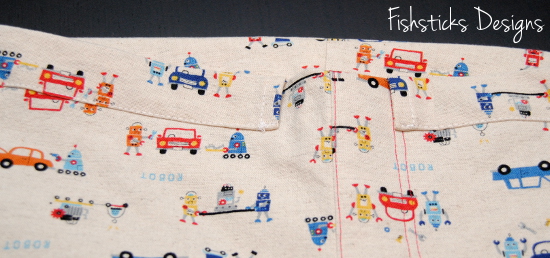 Insert elastic into the elastic channel on the inside of the pants according to the measurements given on your pattern. Sew the opening between the two ends of the drawstring channel shut.
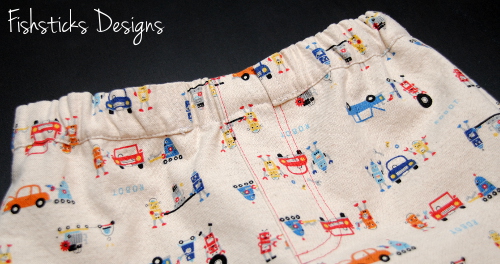 Now you’re ready to make your drawstring. You have a couple of options here. You can make a drawstring that goes all the way around the waistline. If you choose this option, you’ll cut one long length of fabric and finish both ends. In this tutorial, I’m going to show you how to make a drawstring with a small amount of elastic at the back. This will make it so that your child can pull the shorts on and off without having to untie them every time. (For larger sizes, you may have to increase the length of the elastic at the back so that pulling on and off is easy.)
The width of your drawstring pieces is going to be 1 3/4″. There’s a simple formula to figure out the length that you need your fabric. Feel free to skip the explanation and just use the formula below. Start with the measurement that you used for the length of your drawstring channel (the waist circumference)(26″, in my case), add 6″ for safe drawstring length, and add 1″ for 1/2″ seam allowance at each end. For a drawstring without elastic, this is the measurement that you’ll use. In my case, that would be 26″+6″+1″=33″. To create our drawstring with it’s elastic section, we’re going to divide that measurement in half for our two drawstring pieces (33″/2=16 1/2″). The elastic piece is going to add 2″ total, 1″ on each side, so I’m going to subtract another inch from that measurement (16 1/2″ – 1″ = 15 1/2″). Still with me?
THE FORMULA: Add 7″ to the waist circumference. Divide that measurement in half. Subtract 1″.
Cut two pieces 1 3/4″ x this measurement.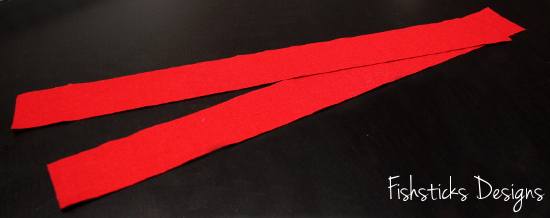 On both drawstring pieces, fold each long edge 1/4″ in to the wrong side and press well.
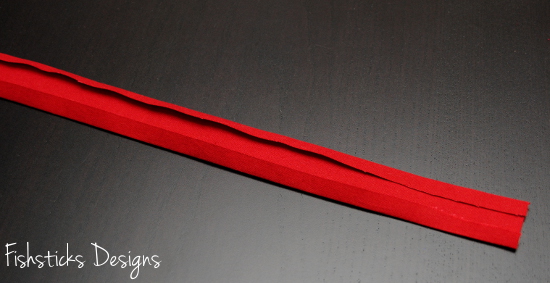 Fold one short end of each piece over so that the right sides are together. Pin and stitch across the folded end of each drawstring piece 1/2″ from the raw edge.
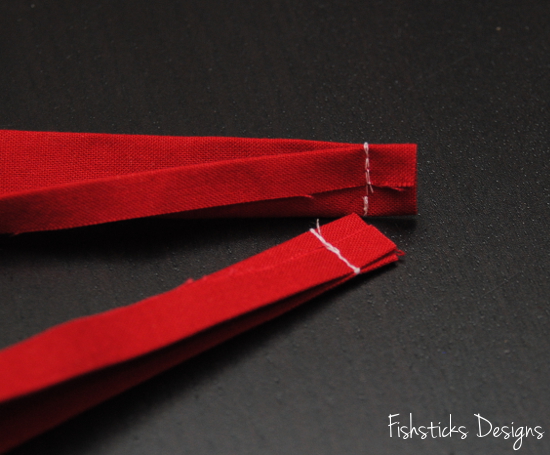 Turn the sewn ends so that the wrong sides are together.
 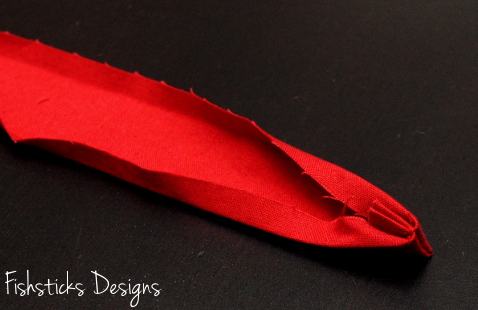 Tuck the raw edges neatly inside and press all the way up. Pin and topstitch the open long edge closed on both drawstring pieces.
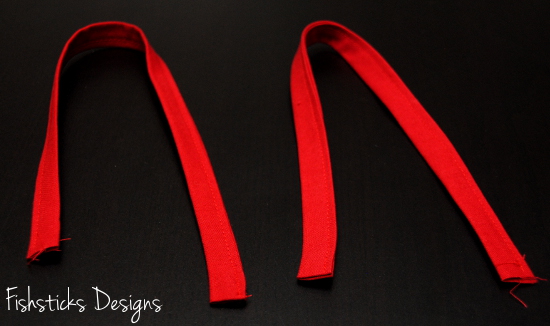 Cut one piece of 1″ elastic 4″ long.
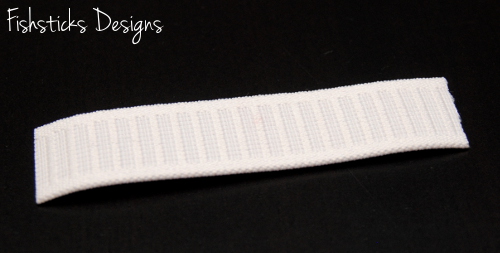 Overlap the raw edges of each drawstring piece 1″ on opposite sides of the elastic. Stitch in place.
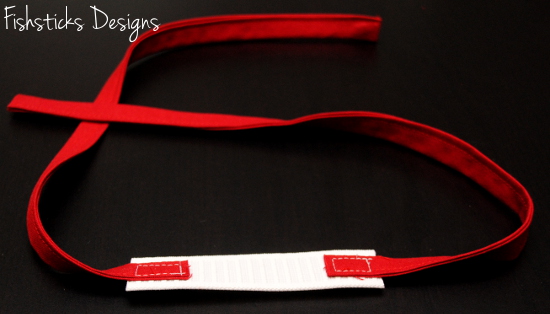 Pull the drawstring through the drawstring channel. Center the elastic piece at the back of the pants.
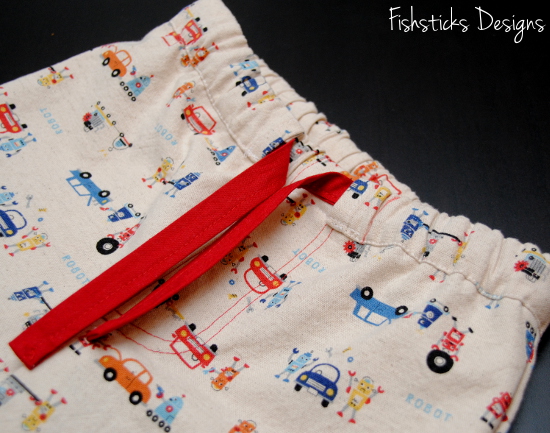 Stitch the drawstring in place at the back seam of the pants to keep it safely inside its channel.
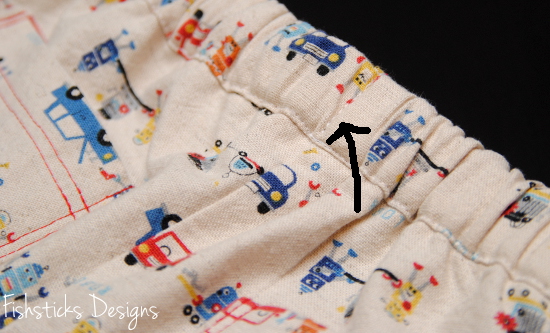 Tie up the drawstring, and you’re done!
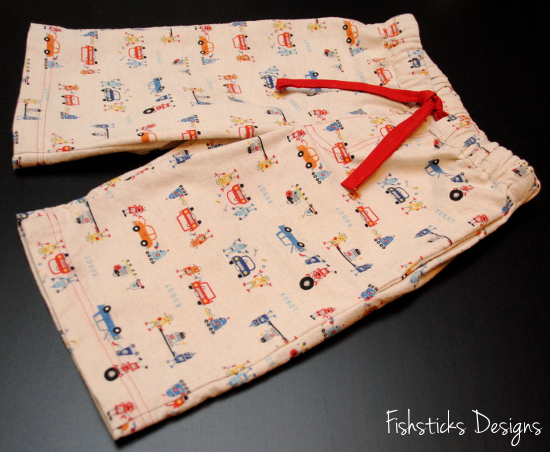 If you use this tutorial, I’d love to see! Feel free to add a link in the comments or add your picture to the Fishsticks Designs Flickr group!

Hi there –
I have a quick question about your blog. Could you please email me when you have a chance? Thank you!
What a great tutorial! Thank you for putting it together. I can’t wait to try it out. I might try it on pj pants for myself! 😉
I love it! You had my brain thinking about it yesterday! I agree with post
Above, I am going to try it on a pair of pj shorts for me! Lol
Thank you for all the pictures! So much easier.
LOVE this technique, look and fabric!
Your clothes are soo cute!! i love that technique!! its so cute!!
WOW! Thank you so much. I am just getting ready to cut out a pair of pajama pants for a customer. This is so amazing. I will use this on all my PJ’s of course with your permission.
You are more than welcome to use it, Rebecca! Thank you so much for asking!
Thanks Bonnie, All pattern pieces are cut out and ready to sew, tomorrow. When finished, I’ll show you.
Thank you so much! I just did this to only the second pair of pants I’ve ever made! Took me about 3 hours as I’m not the most knowledgeable with my ma’s ancient sewing machine yet, but I love the results! It’s really hard resisting the urge to go put them on my sleeping 14 month old daughter!
Thank you so much! I just did this to only the second pair of pants I’ve ever made! Took me about 3 hours as I’m not the most knowledgeable with my ma’s ancient sewing machine yet, but I love the results! It’s really hard resisting the urge to go put them on my sleeping 14 month old daughter!
I’m so glad that you enjoyed the tutorial, Jen! And, so cool to hear that you tackled it on only your second pair of pants! You’ll be a sewing pro in no time. (Don’t wake the sleeping baby, though! Just go sew something else until naptime is over.)
Thank you for this great tutorial! I make bloomers for my granddaughter and haven’t cared for the all elastic waist (the look nor the impracticality). Your waistband is tailored and still kid friendly. And your instructions were very easy to follow. Thanks again.
What a great idea, I been making pants and loungers (pj) bottoms for a very long time, wish this idea would of been thought of sooner makes a lot of since to me. Thank you- Sherry
just loved ur creativity..:-) & the fabric design too..!
Love this. I ‘m on board for trying it with adult pj’s also.
I don’t mind making button holes at all but I love this look. Thank for a very nice tutorial.
I love this technique…however confused about cutting the waistband channel piece….is it 2×26″. If so, how do you pin and sew the 52′ around the existing waistband. I would really appreciate your help.
Kay
Thank you so very much for posting this. It is amazing!! 🙂
Owing to the web based nature of, hacking will do become challenging since the video games are machine based meaning
the designer has a completely transparent look at of the sport and he is able to see who will be using tweaking and that is not,
which suggests if virtually any kinds of unfair procedures of participating
in the game employing hack equipment is diagnosed by the programmer, he has the total liberty to be able to ban through the computers.
What kind of fabric did you use for the drawstrings.
I am making “board shorts” for sending to Africa and using the sturdier cotton which I do not think will make a good drawstring. I was thinking of using maybe a twill tape type of trim to cut down on time. I will still put the elastic in the back and stitch it in the back seam so it can’t move. Can I do this by using a single waistband and leaving the seam open in the front portion for the drawstring ends. Your thoughts appreciated.
I love Pat’s idea of using twill tape; that sure saves on a lot of time and effort and I personally think it would look just as or even more professional. I will be trying that on my next jammy bottoms for winter.
Extending a belated thank you for this post! I followed your method to modify PJ pants pattern for my kids. It worked so well …. looked adorable and the waistband held up great after probably over 100 washes. Today my kids are now 11 and they want to make a new pair for themselves. I am so relieved to find this post active now as we embark on our sewing project: matching family PJs. Thanks a ton. These are the best instructions available anywhere. I am a total beginner and the results were fantastic. ❤️
What a great technique! I have been sewing for decades and never thought of this before. Thanks for the tutorial.