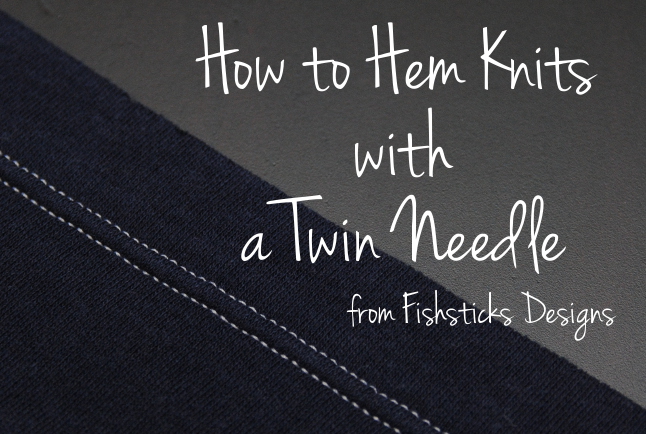
 I originally shared this information as part of the Charlie Tee Sew-along in July of 2013, but I thought it deserved to be turned into a stand-alone tutorial so that it’s easy for you to refer to when necessary. The twin needle is a perfect choice for hemming knits, not only because it gives your sewing a beautiful finished look, but also because it gives you two rows of stitches on the front (see above), and a nice stretchy zig-zag on the back (see below). That stretch in the twin needle hem goes a long way in helping to prevent popped stitches.
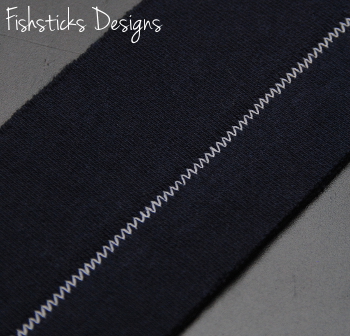 Let’s get started! First you need a few tools: a twin needle (also referred to as a double needle), your regular spool of thread and a second source of thread (I use a bobbin). Since you’re working with knits, it’s best to use a ballpoint or stretch twin needle. Those are hard to find locally, but they are pretty easy to find online: stretch twin needle, ballpoint twin needle. I prefer the 4.0 mm twin needle — that number refers to the measurement between the left and right needles. You can use a 2.5 mm if you’d like your stitches closer together.
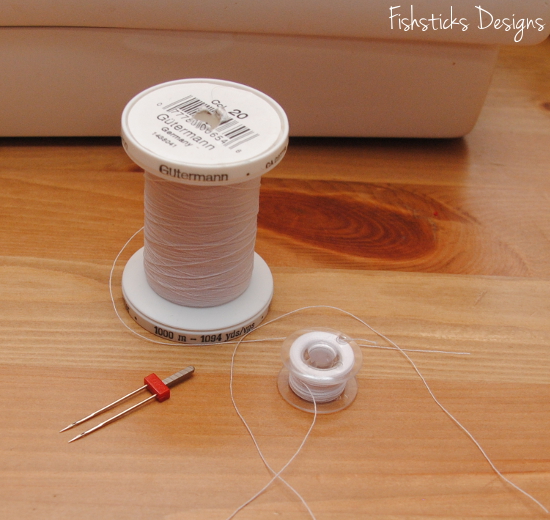 Some sewing machines, like mine, have a button or switch that needs to be pushed to change from single to double-needle sewing. Here’s what that button looks like on my machine. Go ahead and press that button. Remove your single needle and replace it with the twin needle.
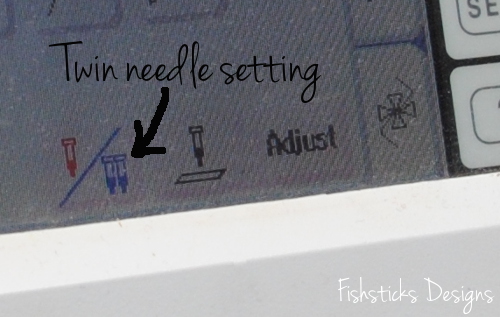 Many sewists put both thread sources on the pin that holds your regular spool. On my machine the threads tend to tangle when I do it this way.
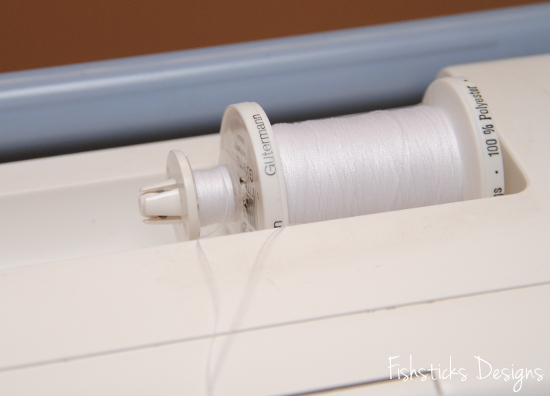 Some machines have a extra removeable pin just for a second spool of thread. I think mine did at one time, but I’m not sure where it’s disappeared to. It’s not a problem, though, since I’m using a bobbin for my second thread. I just pop that bobbin onto the bobbin-winding pin with the thread feeding towards the front of the machine.
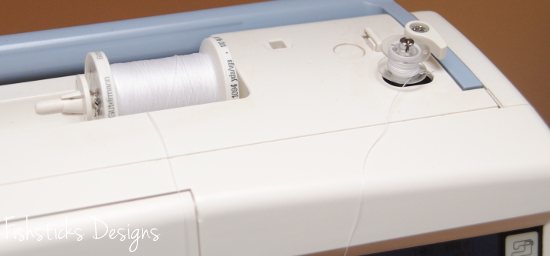 You can thread the twin needle by pulling both threads through as one. My machine is a little bit picky, though, and I’ve had to work with it until I found the best way to thread the twin needle. What I do is thread the left needle first from the spool of thread, then I press and hold that thread in place on top of the machine just before it enters the guides while I thread the right needle from the bobbin.
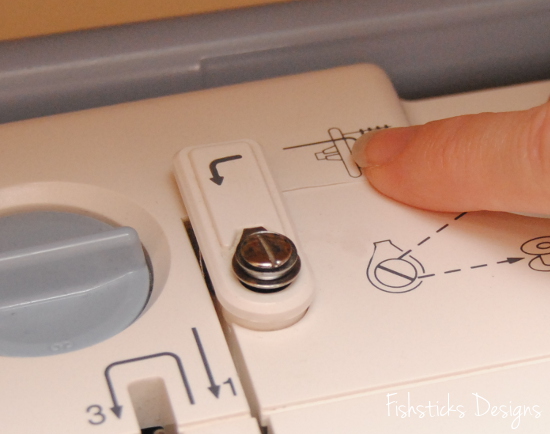 Once I have both needles threaded, I pull the threads back away from the machine as one.
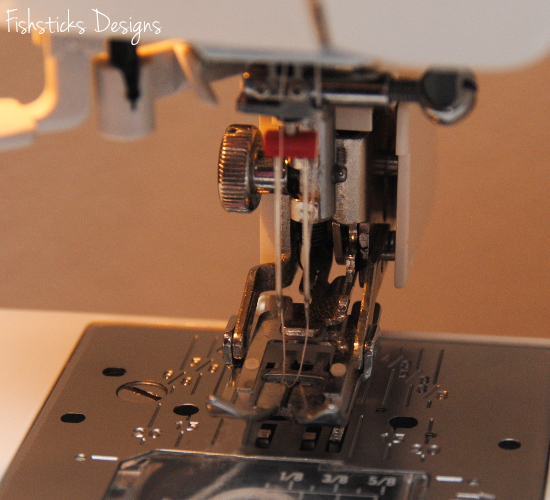 Now that your twin needle is threaded, we’re ready to get hemming! I serge the raw edges of my hems, but that is purely for aesthetic reasons. (I like for the inside of my garments to look as nice as the outside.) Because knits don’t fray, you can totally skip this step if you want to.
 With a hot steam iron, press your hem allowance to the inside. If your knit is particularly stretchy or uncooperative, use a little spray starch when you iron.
 Because we’re going to be stitching on the right side of the fabric, and I don’t want to sew over my pins, I use long pins and position them so that the heads hang off of the folded edge. This way, I can make sure that the hem is pinned properly, and I can remove them as I get to them while I’m sewing.
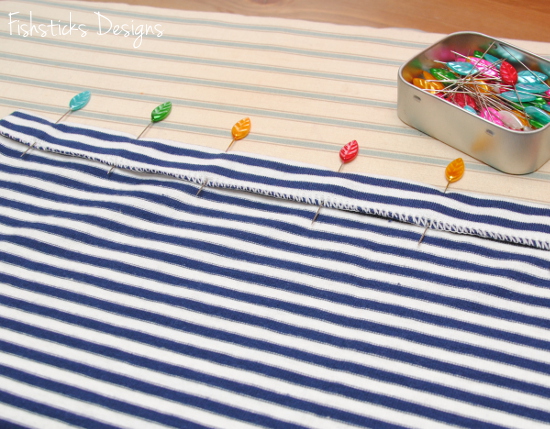 I like to start my hems about 1/2″ in from the edge of the fabric. Set your stitch length to 3.0 or 3.5. (Shorter stitch lengths stretch fabrics.) I backstitch about 1/4″, then stitch all the way across feeling through the fabrics to make sure that my stitching is falling just inside the raw edge on the underside of the fabric. I stop stitching about 1/4″ from the opposite side, backstitch to 1/2″ then sew forward again to the end. (Starting your stitching a bit in from the edge will help to keep your machine from “eating” the end of your knit fabrics. Backstitching to 1/2″ will help make sure that you don’t chop off your fastening stitches when you serge later.)
 Be careful not to stretch or pull your fabrics as you’re sewing. Just guide and let the feed-dogs pull them through. (This is much easier with a walking foot!) Pulling on your fabrics while you’re sewing can lead to hems that look like this:
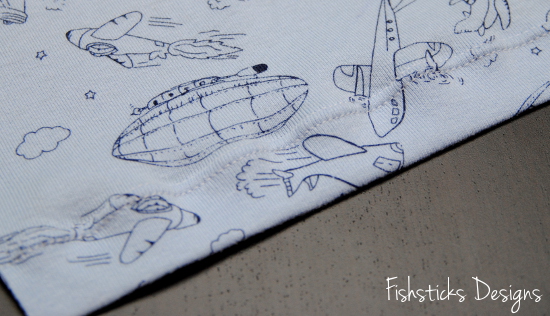 What you really want, though, is hems that look like this:
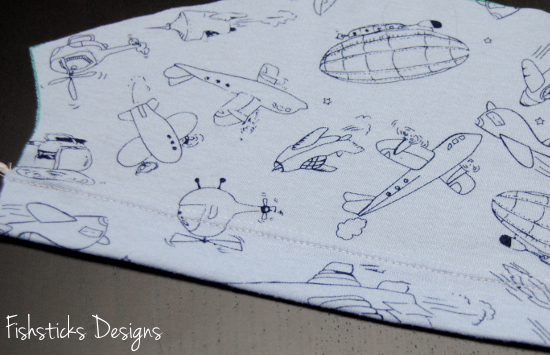 That wasn’t too hard was it?
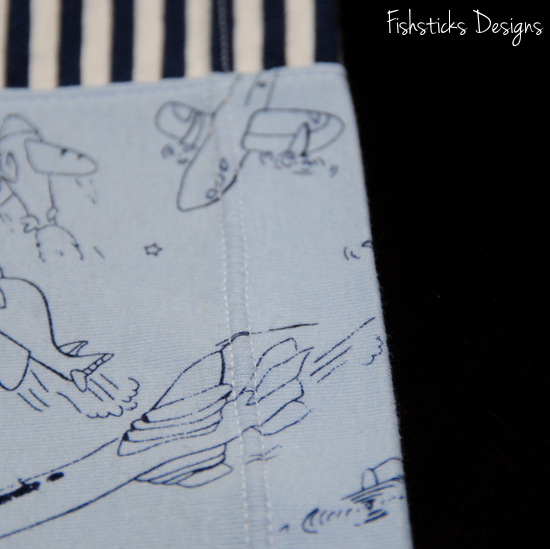

I have used this technique a lot and found that on the waistband of elastic waist baby pants I get a lot of popped stitches after repeated wear. Granted, these are being pulled on over bulky cloth diapers. Can you use a triple stretch stitch with a twin needle? I love this for tacking down seams on cuffs and for hemming knit garments for adults, though.
Hi, Audrey! I only recommend this stitch for hemming. For waistbands, I personally just use a regular stitch with Woolly Nylon in my bobbin, and I’ve never had a problem with popped stitches. The elastic in the waistband should really be doing most of the stretching and taking the stress off of the stitches. That said, though, if you’re having issues with waistband stitches popping, the triple-stretch stitch is a great choice! Another option is to sew the waistband separately and attach it using your serger. My AJ Bottoms pattern has a separate waistband, so you can see what I mean here: http://www.fishsticksdesigns.com/patterns/pants/the-aj-bottoms/.
Thank you for this wonderful tutorial. I am falling in love with sewing with knits but am new to wooly nylon thread! It is so stretchy, please give any advise you can, love your site! Many thanks, sandra
nice work, love it.
Hi what does a double needle do when you hem georgett material.
I love the look of hemming shirts with a twin needle, however, my fabric tunnels every time. I’ve tried lowering the tension to almost nothing and using tissue paper underneath. Nothing works. Can you give me any suggestions?
To prevent tunneling, try using a wash-away stabilizer where you’re stitching. I use a Floriani product in 1/2″ tape that washes away (instead of pins to hold my hem in place)
Well thanks for the information I always thought that people used an hole other machines for the twin stitch such as people need a different machines for an overlocker ,thanks very helpful and simple you get straight to the point.