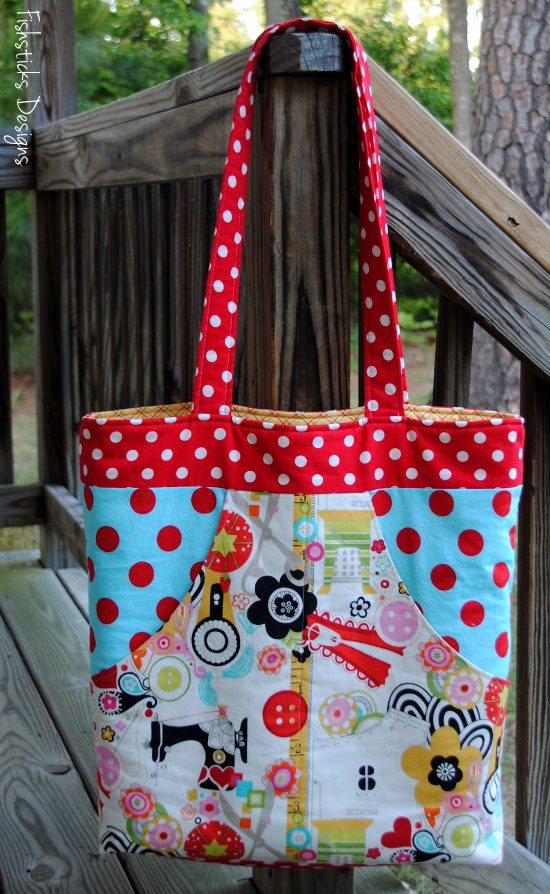
This post originally appeared in The Make for Mom Series at The Shaffer Sisters in May 2013. My husband and I have a habit of packing up our kids and heading out on road trips with stops in multiple states to visit friends, family and ministry supporters, and we always try to throw in some sightseeing (homeschooling on the road, right?), too. With so many stops, I need to keep myself organized. I put together this enormous tote bag with tons of pockets just before our last trip which included stops in West Virginia, Tennessee, Washington DC and Virginia. Crazy, right? This bag was such a great help!
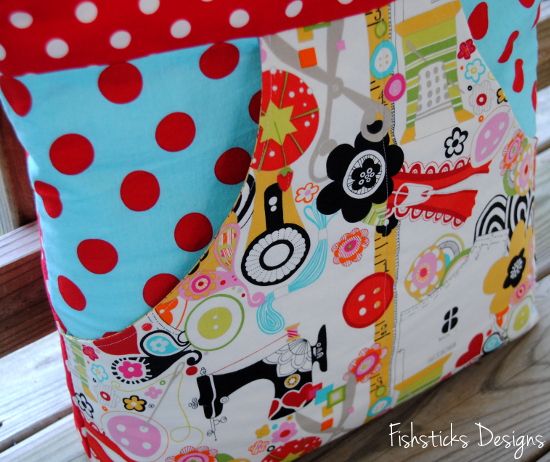 I knew just what I wanted from this bag, so I designed it exactly to my own specifications. It’s sort of huge at 16″ wide by 17″ tall by 4″ deep, but it holds everything that I need it to hold, and it looks pretty doing it!
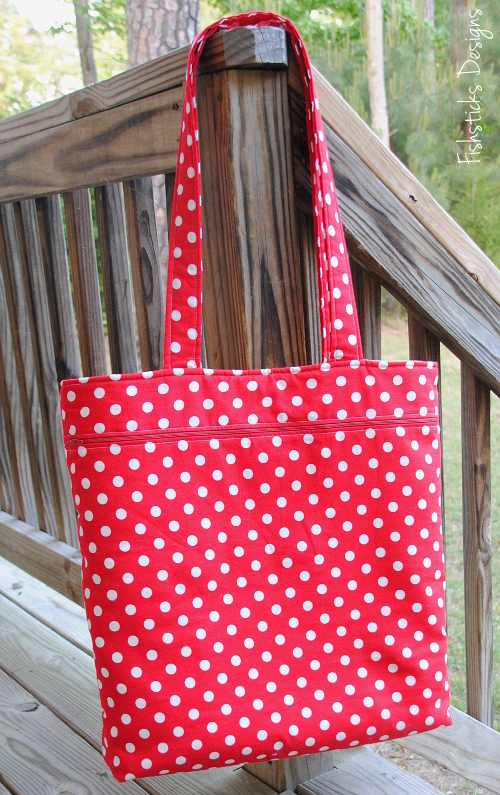 I added decorative pockets to the front and a zippered pocket on the back.
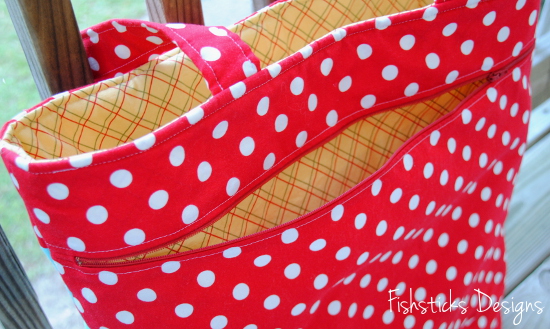 But, what I really want to show you is the inside of the bag.
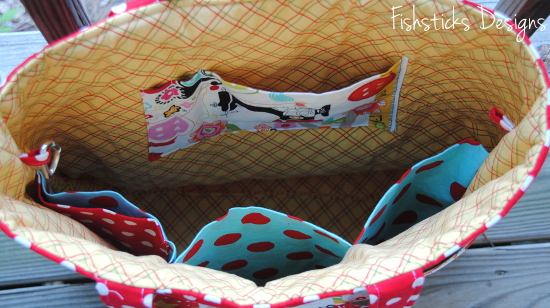 Without inside organization, the size of this bag would make everything disappear. Adding pockets and loops to the inside of any bag, though, is really simple. Once you know how to do it, you can grab your favorite tote bag pattern and customize it perfectly for you!
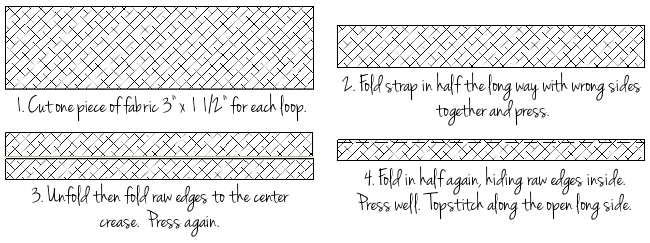
You’ll want to have your inner bag pieces cut and any interfacing added before starting on these little extras. Have a quilting ruler and a washable or disappearing marker handy. If you’ll be making custom-sized pockets for anything (cell phone, notebook, etc.) then have those ready to be measured, too. I’m using a 1/2″ seam allowance on everything and assuming a 1/2″ seam allowance on your bag pattern.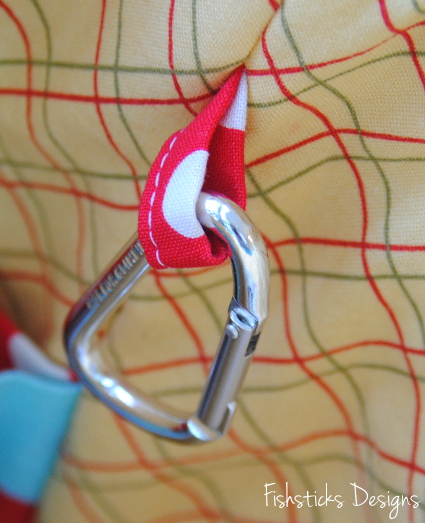 Let’s start with the loops. These little loops are really the most basic thing you can add to a bag, but you’ll be so surprised at what a difference they make! With a bag this big, you simply must have a way to clip in your keys or anything else that you need to be able to access quickly. With a loop or two sewn into the side seams and a carabiner clip, you’re good to go!
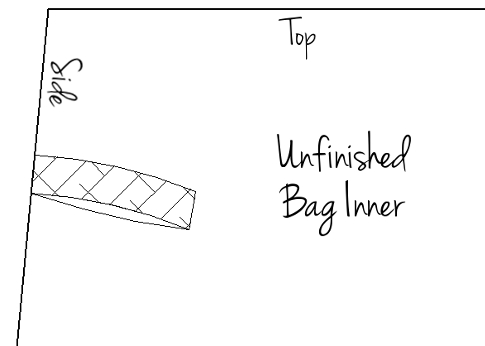
 Fold your loop piece over to form a loop, matching up the raw edges. Pin in place as shown and baste it to one side of your unfinished bag inner.
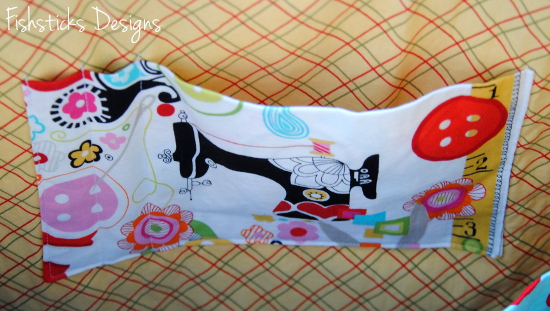
 Now, let’s move on to the pockets. I designed this smaller pocket to hold a pen, a pencil and my little notebook.
 To make your own custom-sized pocket you have to do a little math, but it’s really simple, I promise! For pens or pencils, a 1″ wide pocket is perfect. I usually make credit card or loyalty card pockets 3 1/2″ wide. (That width works for my I-phone, too.) If you have something specific, like my notebook, measure it across and add 1″ for your pocket width. My notebook is 5 1/2″ wide, so its pocket needs to be 6 1/2″ wide. With me so far? The height of your pocket should at least 3/4 of the height of the things you’re putting in it. That will keep them tucked nicely in place. For a standard pen/pencil/card pocket, I usually go with 4 1/2″ finished height. My notebook is taller, though, so I made this pocket with a finished height of 5 1/2″. Now you should have all your measurements. Here are your formulas: pocket width + pocket width + pocket width + 1″ seam allowance + 1/4″ topstitching allowance = fabric width and pocket height x two + 1″ = fabric height. Just keep in mind that you are limited by the width and height of your bag. Pretty easy, right? Here are my formulas:
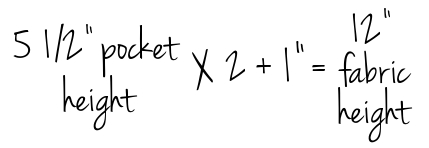 I’m going to cut my pocket fabric 9 3/4″ wide by 12″ high (or long, I guess). Your pocket width and height may be different, though, based on what you’re putting in it. (If you want to cheat a little, for two pen/pencil pockets and two card pockets, I generally go with 10″ x 10″.) Now that you’ve survived that math, sewing the pocket is super simple. Just fold your pocket piece in half with right sides facing and match up the edges that measure the width of your pocket. (In my case, I’m matching up the 9 3/4″ edges.) Stitch along sides and bottom, leaving a 1 ½” opening in one side for turning.
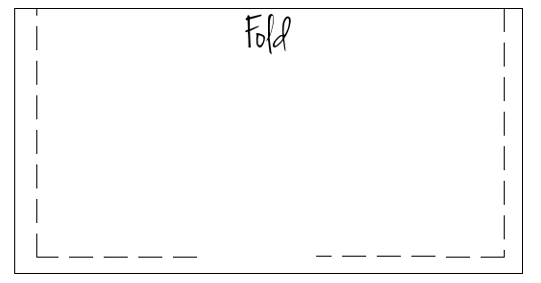 Trim your corners and turn your pocket through the opening. Press it really well. Center your pocket with the folded edge facing the top of the bag on one of your inner bag pieces. You can place it at whatever height you’d like, but I usually go with about 3 ½” to 4″ from the top edge. Topstitch around the sides and bottom 1/8″ from the edge. Once your pocket is sewn onto your bag panel, just use a quilting ruler to measure your pocket widths, then draw lines with your disappearing marker. Stitch down each line, remove the marker and your pockets are done! (A little tip here: stitch from the bottom up to avoid any puckers!)
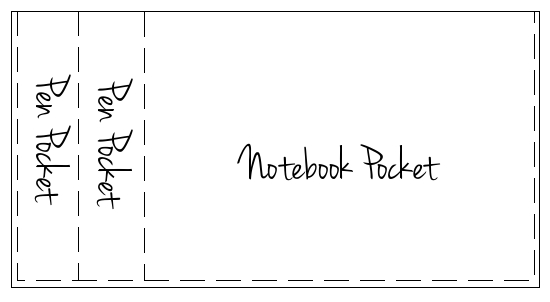 Whew! That wasn’t too hard, right? Ready for one more set of pockets for the other side of your bag?
 For this set of pockets, you’ll cut your fabric width the same as the width of your bag. You’ll use the same formula that we used above for your fabric height. Since I wasn’t exactly sure of what I’d be putting in these pockets but I wanted them to be pretty roomy, I went with 9″ for my finished height. The width of my bag inner piece was 21″, so I cut my pocket piece 21″ wide by 19″ (9×2+1) high. To sew this pocket, you’ll only need to stitch across the bottom edge because the sides will be tucked inside your bag’s seam allowance. Fold your fabric over with right sides together, the same way you did with the smaller pocket and stitch across the bottom edge.
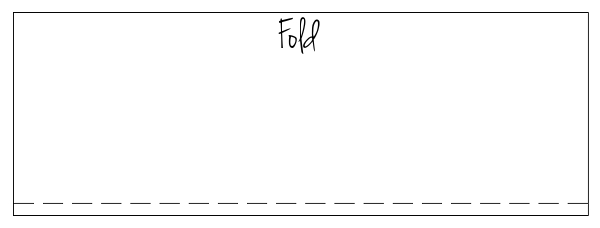 Turn your pocket through one of the short ends and press it well. You can see in the photo above that I tucked another little pocket inside this big pocket. That’s a designated spot for my cell phone. To determine the size of this pocket, simply follow those instructions for the small pocket above. Once you’ve sewn your cell phone pocket, turned and pressed it, you’ll simply topstitch it to the inside of one of your large pockets. Let’s decide on the width of your large pockets first. These pockets can be as wide as narrow as you want them. For mine, I just divided the width of my fabric into thirds. Since my fabric was 21″, that made each pocket about 7″ wide. Using this measurement to be sure my cell phone pocket didn’t end up chopped in half between two pockets, I marked a spot and topstitched my cell phone pocket inside what would become one of the pockets closest to the edge of my bag.
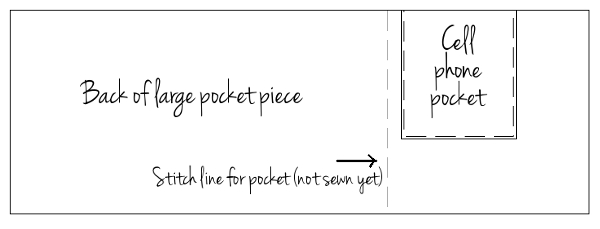 Now you’re ready to sew your large pockets to your bag. Position your pocket piece on your bag inner piece. The positioning with change depending on how tall your bag is, but I placed mine with the top edge 5 1/2″ below the top of the bag. Topstitch the bottom edge at 1/8″. Use a quilting ruler to measure your pocket widths, then draw lines with your disappearing marker. Stitch down each line, remove the marker and these pockets are done, too!
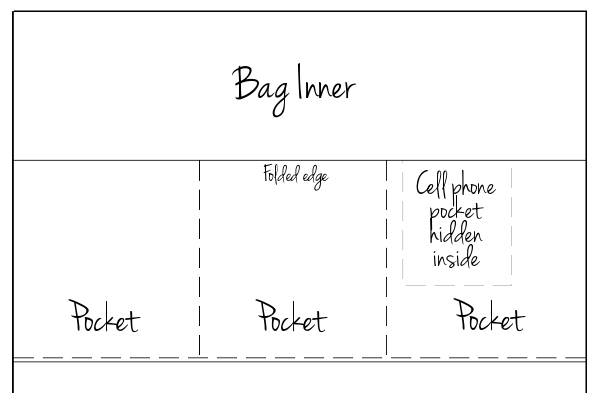 Now all that’s left is to finish your bag according to your pattern instructions. Then fill it up and go!


I guess that you spend so much time for this article. Thank you!
They are so beautiful 🙂
Lovely tote bag!
Love this! Can’t wait to make myself one!
very beautiful bag…..colors Are great!
Lovely! Can’t wait to try it!!
What a great tutorial, so simple and practical, thank you.
Gretings I am so happy I found your web site, I really
found you by mistake, while I was searching on Digg for something
else, Anyhow I am here now and would just like to say kudos for a incredible post and a
all round interesting blog (I also love the theme/design),
I don’t have time to go through it all at the minute buut I have bookmarked it aand also added your RSS feeds, so when I
have time I will be back to read a great deql more, Please do keep up the superb work.