
 Thanksgiving and Christmas are right around the corner! I know, I know, I’m not sure that I’m ready to hear that either, but I love making handmade gifts, and every year I think if I just get started sooner, I won’t be sewing until 1 a.m. on December 25th! Maybe I’ll actually start early this year? At least I can help you start early! This tutorial is one that I shared at Skip to My Lou last year for the Holiday Bake, Craft and Sew-along, but I just finished putting the whole thing together for you in PDF form to make it easy to download, print and sew!
To download the tutorial, just click here: Holiday Kitchen Gift Set. Be sure to save the file to your computer before you print the pattern.
In case you prefer to read the tutorial here on my blog, here it is for you:
Are you looking for the perfect thank-you gift for all of those holiday party hostesses? The Kitchen Gift Set might be just what you need! The set includes fold-over, oven-mitt potholders (my favorite kind) and matching dishtowels.
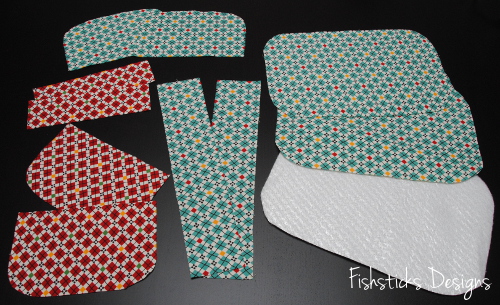
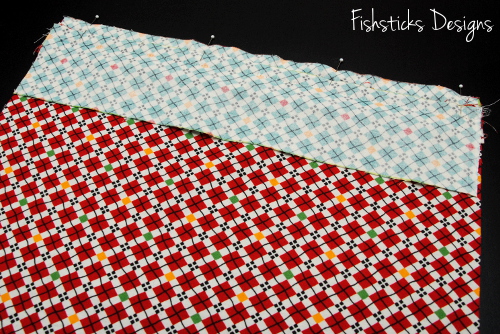
You’ll be able to get two matching potholders and two coordinating dish towels from one yard each of two coordinating cotton prints. You’ll also need 1/4 yard of Insul-Bright or another insulating fleece for the potholders and 1 yard of absorbent cotton fabric for the backing of the dishtowels (diaper fabric, waffle weave, pique, huck toweling, etc.) Let’s start with the potholders! You’ll need the pattern pieces found here: Potholder Pattern Pieces. (Be sure to print that “actual size” and check the measurement of the 2 1/2″ square.) Cut out all of your pieces. For each potholder, you’ll cut 2 pocket pieces of Fabric A, 2 pocket pieces of Fabric B, 2 base pieces of Fabric B, 2 base pieces of Insul-Bright, 2 trim pieces – 7″ x 2″, and 2 ruffle pieces – 12″ x 2 1/2″.
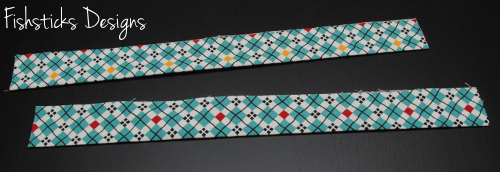
 Fold each of your ruffle pieces over with the wrong sides together and match up the long edges. Press well.
 Sew two rows of basting stitches (the longest stitching your machine allows) along the long raw edges — one at 1/8” and one at 1/4”—leaving the threads on each end 2 to 3 inches long.
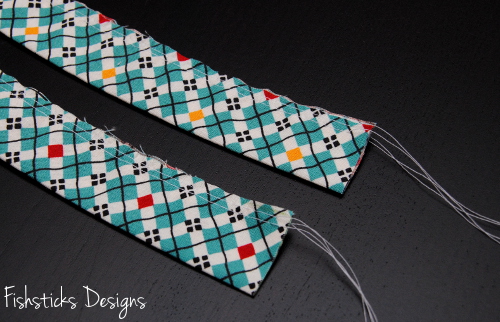 Pull the bobbin threads from each end to gather each ruffle until it is the same length as the trim piece.
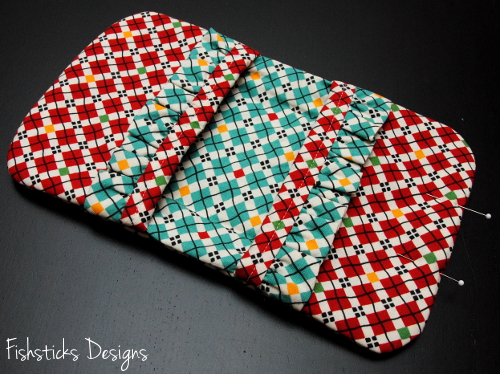
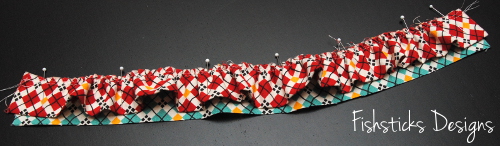
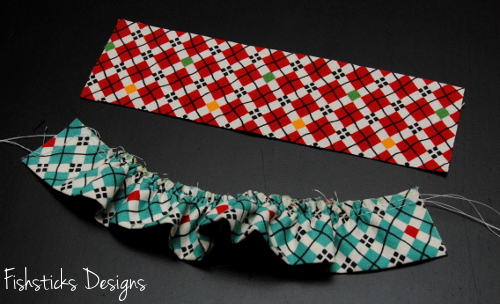 Set one ruffle aside. Pin the gathered edge of the remaining ruffle to the right side of one trim piece along one of the long edges. Check to make sure that your gathers are evenly divided. (You can baste here if you’d like.)
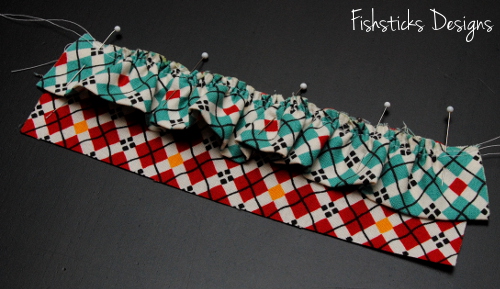 Place one of the Fabric A pocket pieces on top so that the right sides of the trim piece and the pocket piece are together and the ruffle is sandwiched between. Line up the edges as shown and pin in place.
 Sew the pinned edge.
 Flip the pieces to the right side and press the ruffle towards the curved edge of the pocket piece while pressing the seam allowance in the opposite direction. Topstitch 1/4″ from the top edge of the ruffle.
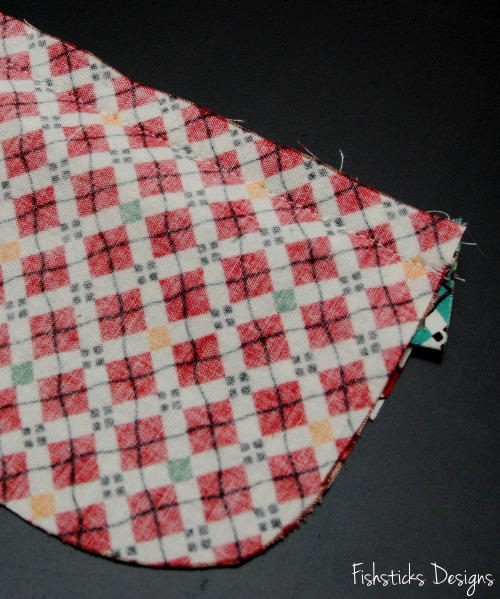
 If you find that you have small spots on each side where the ruffle sticks out. Just flip the pocket piece over and trim those off.
 Pin the long edge of one Fabric B pocket piece to the remaining raw edge of the trim piece with the right sides together. Sew the pinned edge.
 Flip the pieces apart and press the seam allowance toward the ruffle.
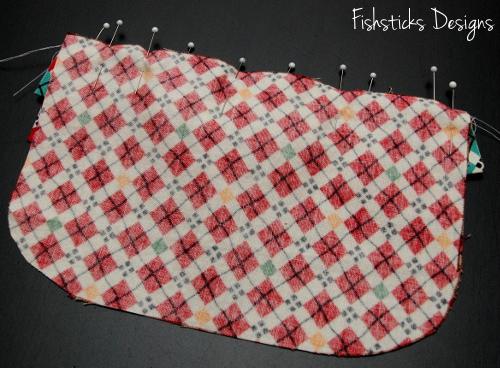
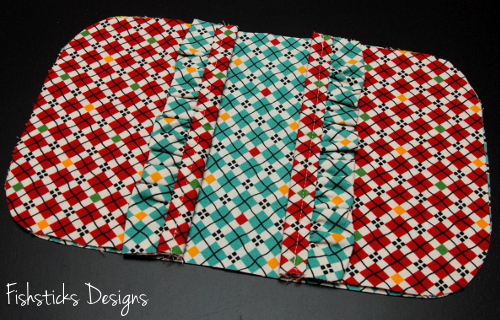
 Fold the pocket over so that the wrong sides are together and the curved edges are all lined up. Press well. Follow the same steps to assemble the remaining pocket.
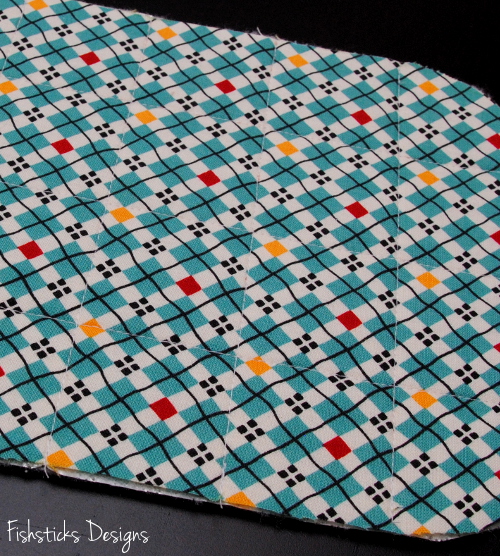
 Set your pocket pieces aside for now. Take one of your base pieces and draw a quilting grid on the right side of it. I used one of my Frixion pens to do this, but you can use a washable or disappearing marker, as well. I placed my lines 1 3/4″ apart, starting from the center in each direction.
 Pin this piece on top of the two layers of Insul-Bright.
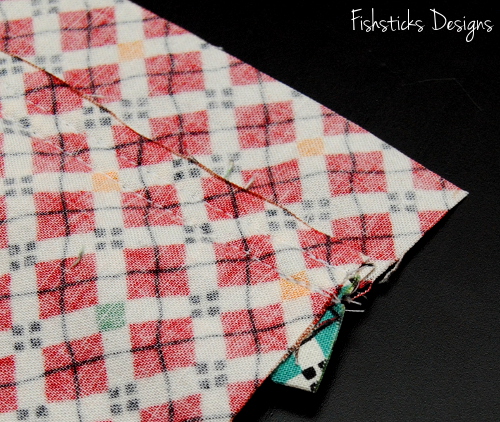
 Stitch down each line, starting with the center line and working out. (If your machine has a walking foot, use it for this step and the remaining steps to help keep your fabrics from slipping while you’re sewing.)
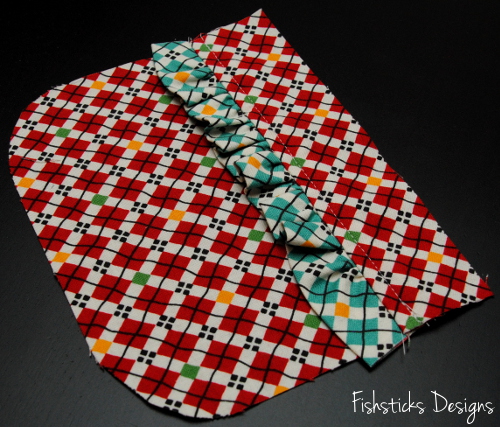
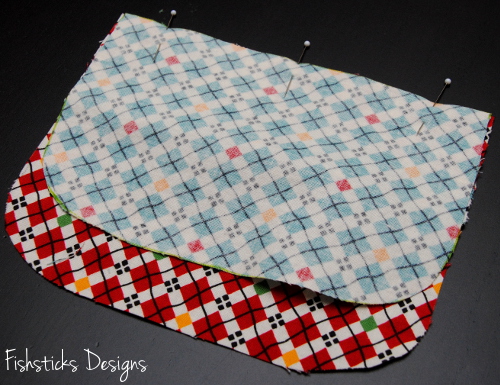
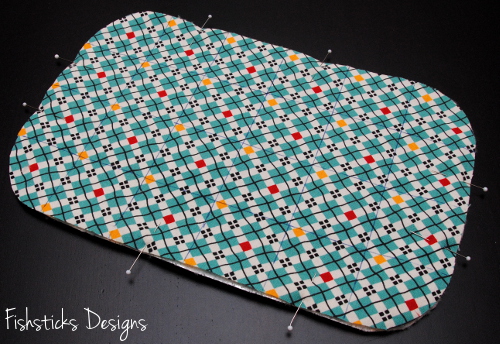
 Place your finished pocket pieces on top of the remaining base piece, lining up the curved edges as shown.
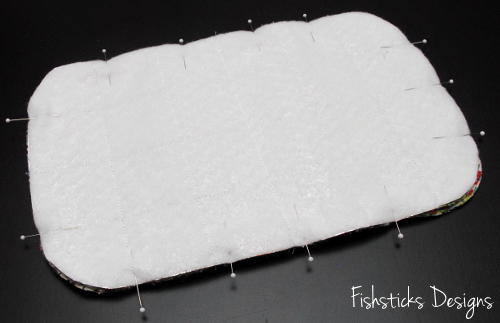
 Flip the quilted base piece/Insul-bright over on top of these so that the right sides are together and the pocket pieces are sandwiched between. Pin in place.
 Stitch all the way around, leaving an opening for turning in one short end. Clip or trim the curves before turning right side out.
 Turn through the opening and push the corners out neatly. Tuck the raw edges of the opening in and press well. Pin the opening closed.
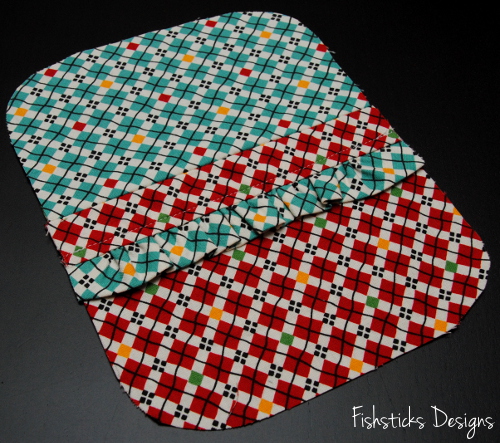
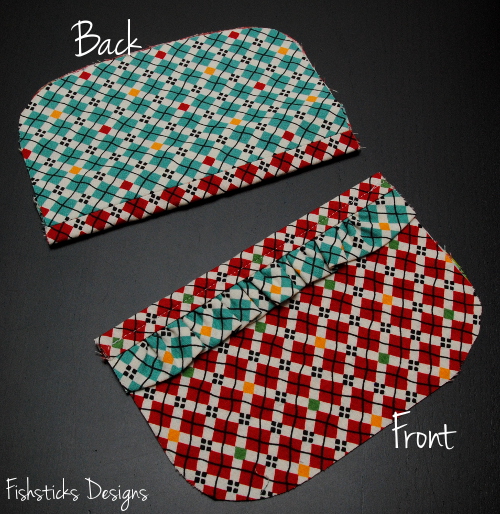
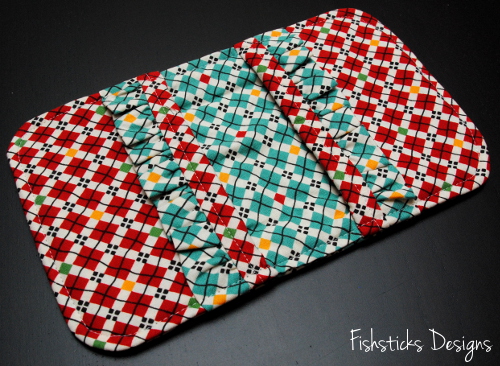
 Topstitch all the way around at 1/4″. (In addition to using your walking foot for this step, a denim needle will help to prevent skipped stitches when going over the thick areas.) Your first potholder is done! Now you just need to make it a mate.
 Let’s move on to the dish towels!
 Start by cutting out your pieces. You’ll need a layer or two of absorbent fabric. (I’m using two layers of diaper cloth from Joanns. Be sure to wash and dry all of your fabrics before getting started!) For each dishtowel, you’ll cut these pieces: 1 or 2 layers of absorbent fabric – 23 1/4″ x 14″ (if you cut two layers, you’ll treat them as one from here on), 1 Fabric A main piece – 21″ x 14″, 1 Fabric A ruffle piece – 22″ x 2 1/2″, 1 Fabric B large trim piece – 3″ x 14″ and 1 Fabric B small trim piece – 1 1/2″ X 14″.
 Follow the same steps that you used for the potholders above to create your ruffle.
 Pin the gathered edge along one long edge of the smaller trim piece on the right side.
 Place the larger trim piece on top so that the right sides are together and the ruffle is sandwiched between. Line up one of the long raw edges of the larger trim piece with the pinned edges of the ruffle and smaller trim piece and pin in place. Sew along the pinned edge.
 Flip the pieces over to the right sides. Press the ruffle towards the larger trim piece with the seam allowance in the opposite direction, but do not topstitch yet.
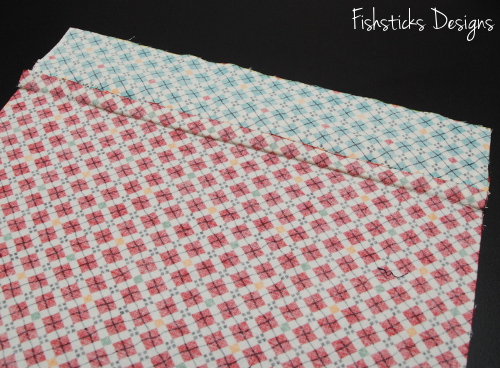
 Line up the remaining long raw edge of the smaller trim piece along one short edge of the main towel piece with the right sides together. Pin and sew.
 Flip the pieces apart and turn to the wrong side. Press this seam allowance over the seam allowance from the ruffle.
 Flip back over to the right side and topstitch 1/4″ from top of the ruffle.
 Place the finished top face down on your absorbent layers so that the right sides are facing. Pin.
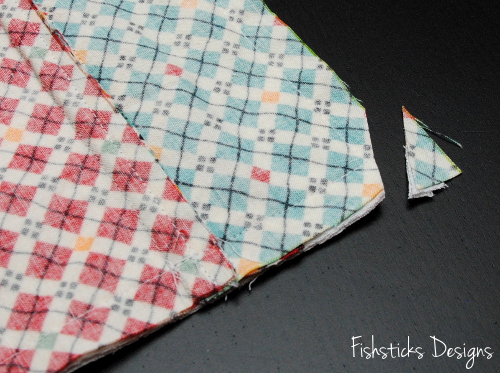
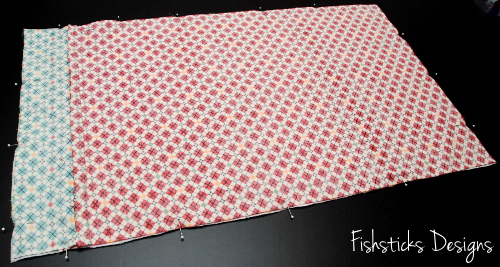 Stitch all the way around, leaving a 4″ opening in one side for turning. Clip the corners.
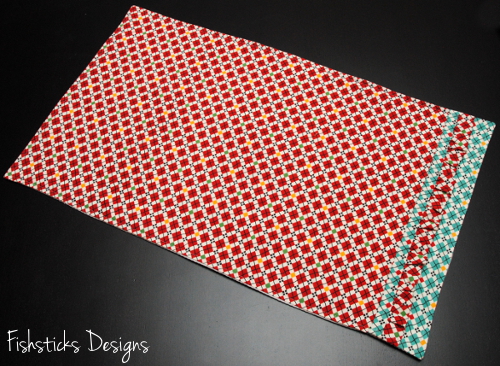
 Turn the towel through the opening. Push the corners out neatly and tuck the raw edges of the opening inside. Press well and topstitch all the way around at 1/4″. Your dish towel is done! Make a second one if you’d like, and your Kitchen Gift Set will be ready to gift to your favorite hostess!

I think you are so generous with your tutorials and help! I love Fishsticks Designs and look every morning before opening emails to see what you’ve crafted! Love the Fun-to-go Kids Tote! Made so many already. You rock!!!
Thank you, Darlene! Your comment was a huge encouragement to me this morning, and I so needed it! <3 <3